LG - How to connect your Ledger wallet via Rabby to Polymarket & fund your account
Reminder: Activate your VPN with a non-restricted location prior to opening the Polymarket website.
If you've never connected to Polymarket before, please ensure you complete all of the steps in this guide carefully, step-by-step, as they are all required in order to to establish a working, funded connection with Polymarket.
Due to the way WalletConnect currently translates the EIP-712 data provided by Polymarket, you will be required to link your Ledger to a Rabby wallet and complete your connection using this method (very similar to the Insilico connection method for YF10 members).
This solves the current known Polymarket issue because software wallets (like Rabby) parse the EIP-712 data differently than WalletConnect does.
Before you start this guide, please make sure you have:
- Created a new Arbitrum account on your Ledger wallet:
Ledger: How to add an Arbitrum account to your Ledger hardware wallet
- Funded that account with a small amount of ETH (for gas) and whatever amount of USDC you wish to trade with
HL04 | LG - How to transfer ETH & USDC to a Ledger On The Arbitrum Network
- Downloaded and installed a Rabby wallet (if you don’t have one already)
RW01 - How to set up a Rabby wallet
- Enabled blind signing on your Ledger device
https://support.ledger.com/article/4405481324433-zd
Step 1. Adding a Polygon Account to Your Ledger Device
You will need a Polygon account in your Ledger to connect to Polymarket, so the first thing we want to do is create one.
-
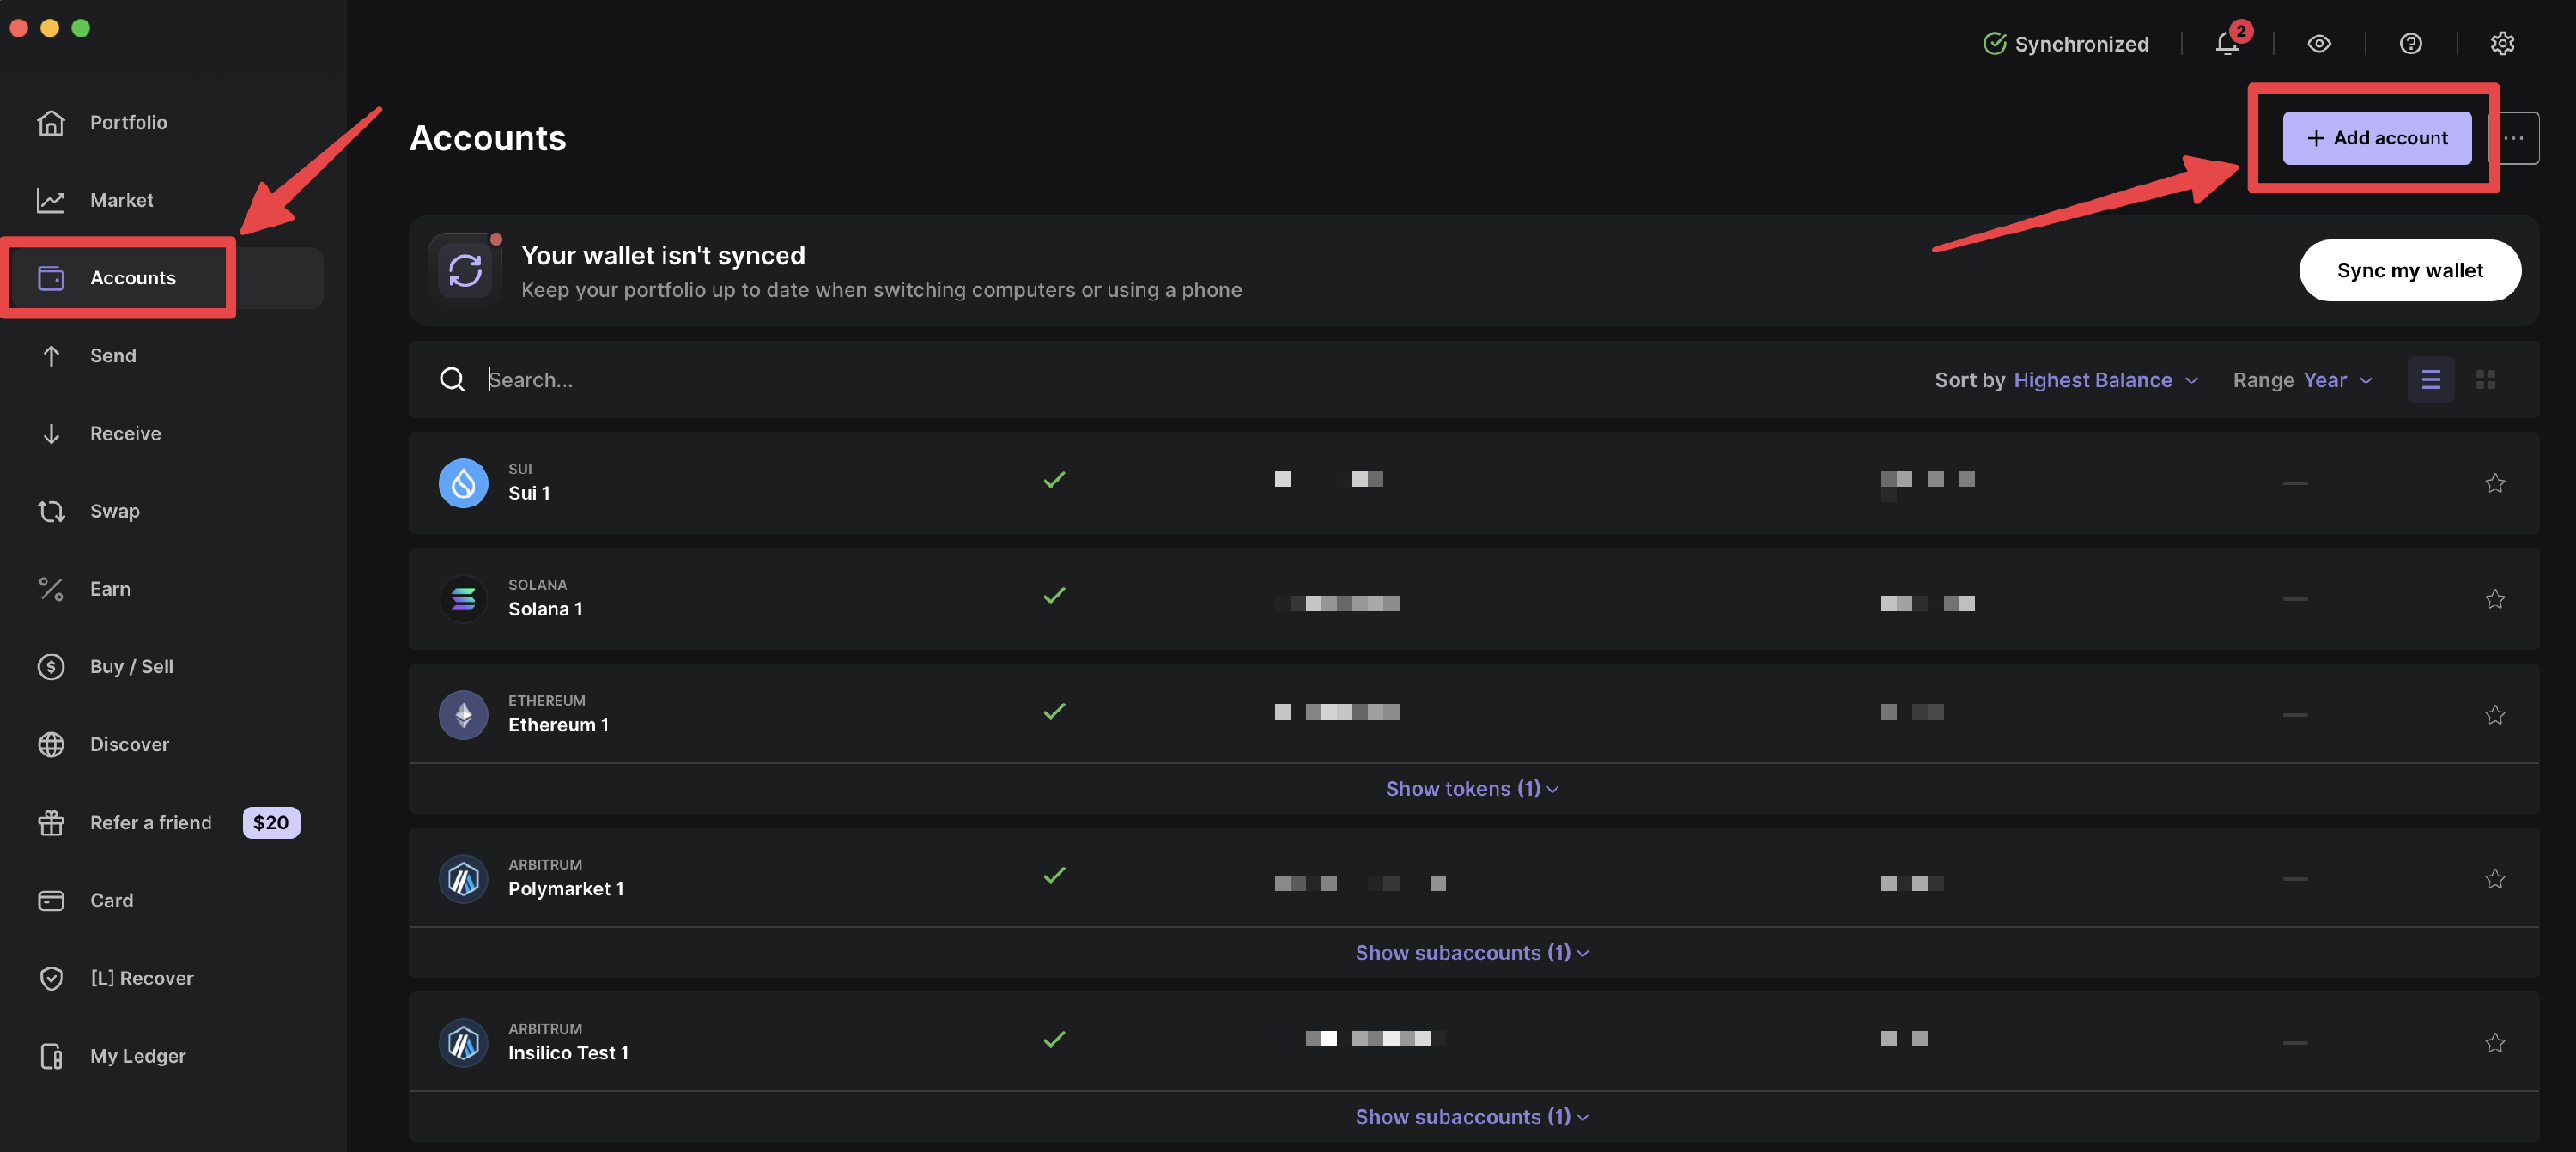
In Ledger Wallet, go to "Accounts" in the left navigation menu, then click on the "Add Account" button in the top right corner.
-
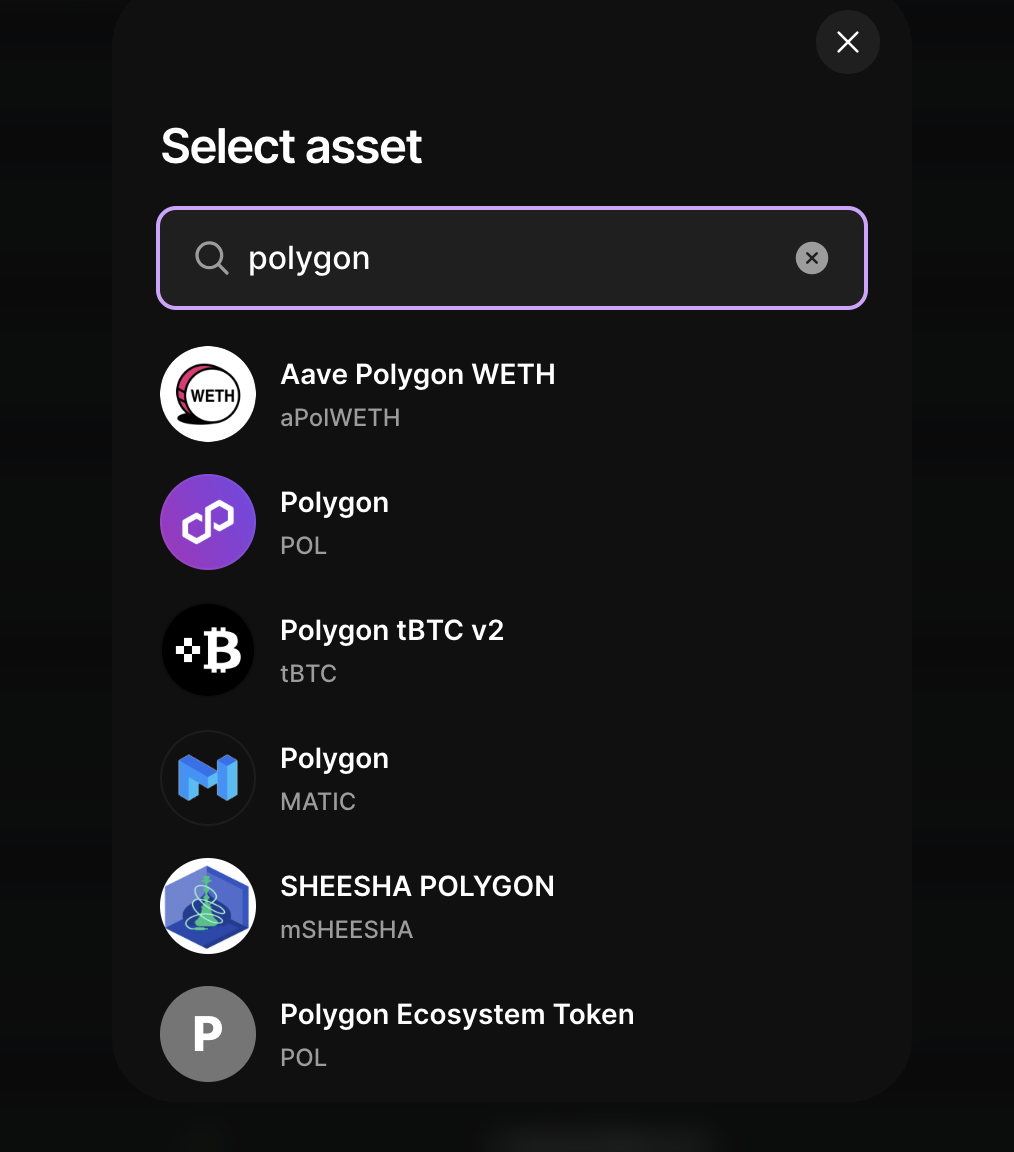
Type "polygon" in the search box, and select Polygon (POL) from the list.
-
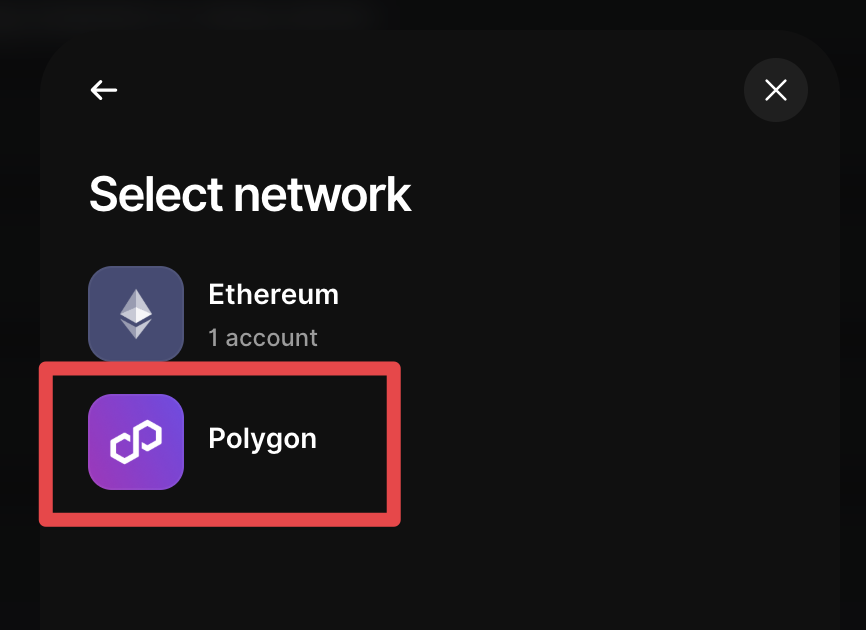
Select Network: Polygon
-
If you only have one Arbitrum/Ethereum account on your Ledger, then you may only have one corresponding Polygon account to choose from, so select that one and click "Confirm".
If you have more than one Arbitrum/Ethereum account on your Ledger, you may see multiple options come up as in the screenshot below. You only need one, so choose the account with the same address as the Arbitrum account you've already funded, and deselect any others. Then click "Confirm".
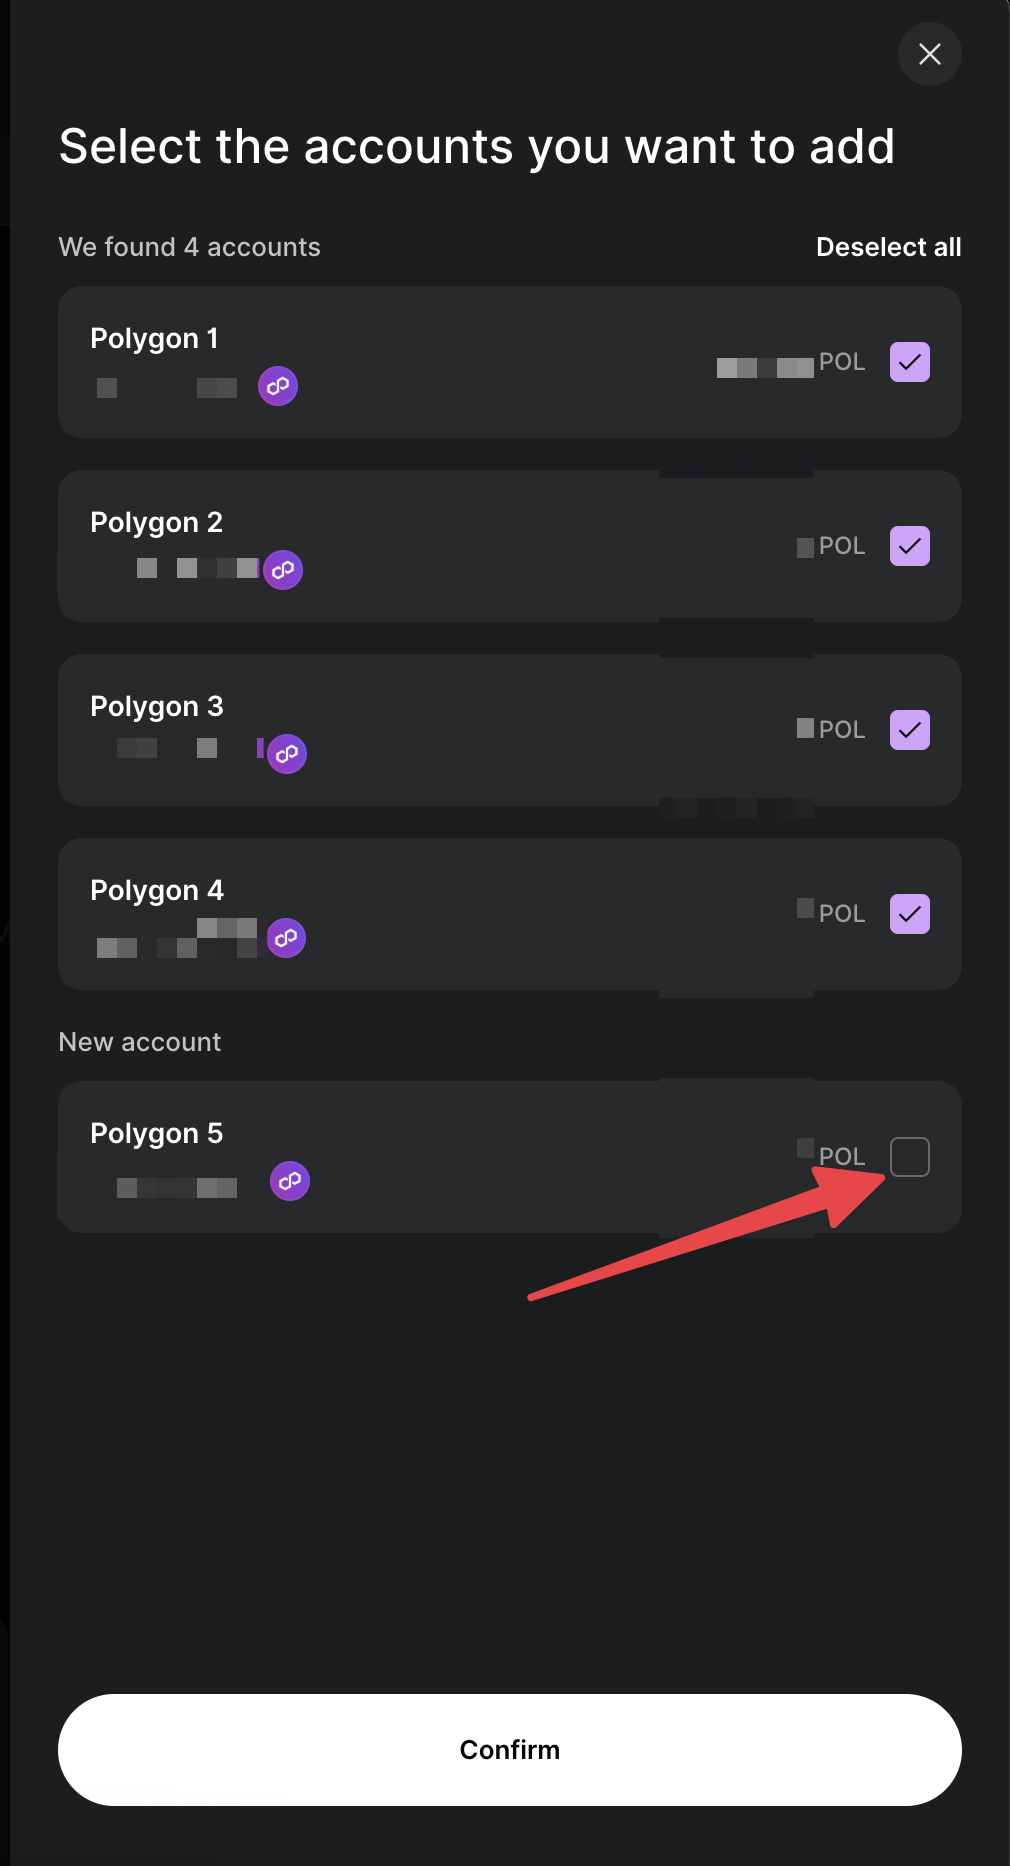
-
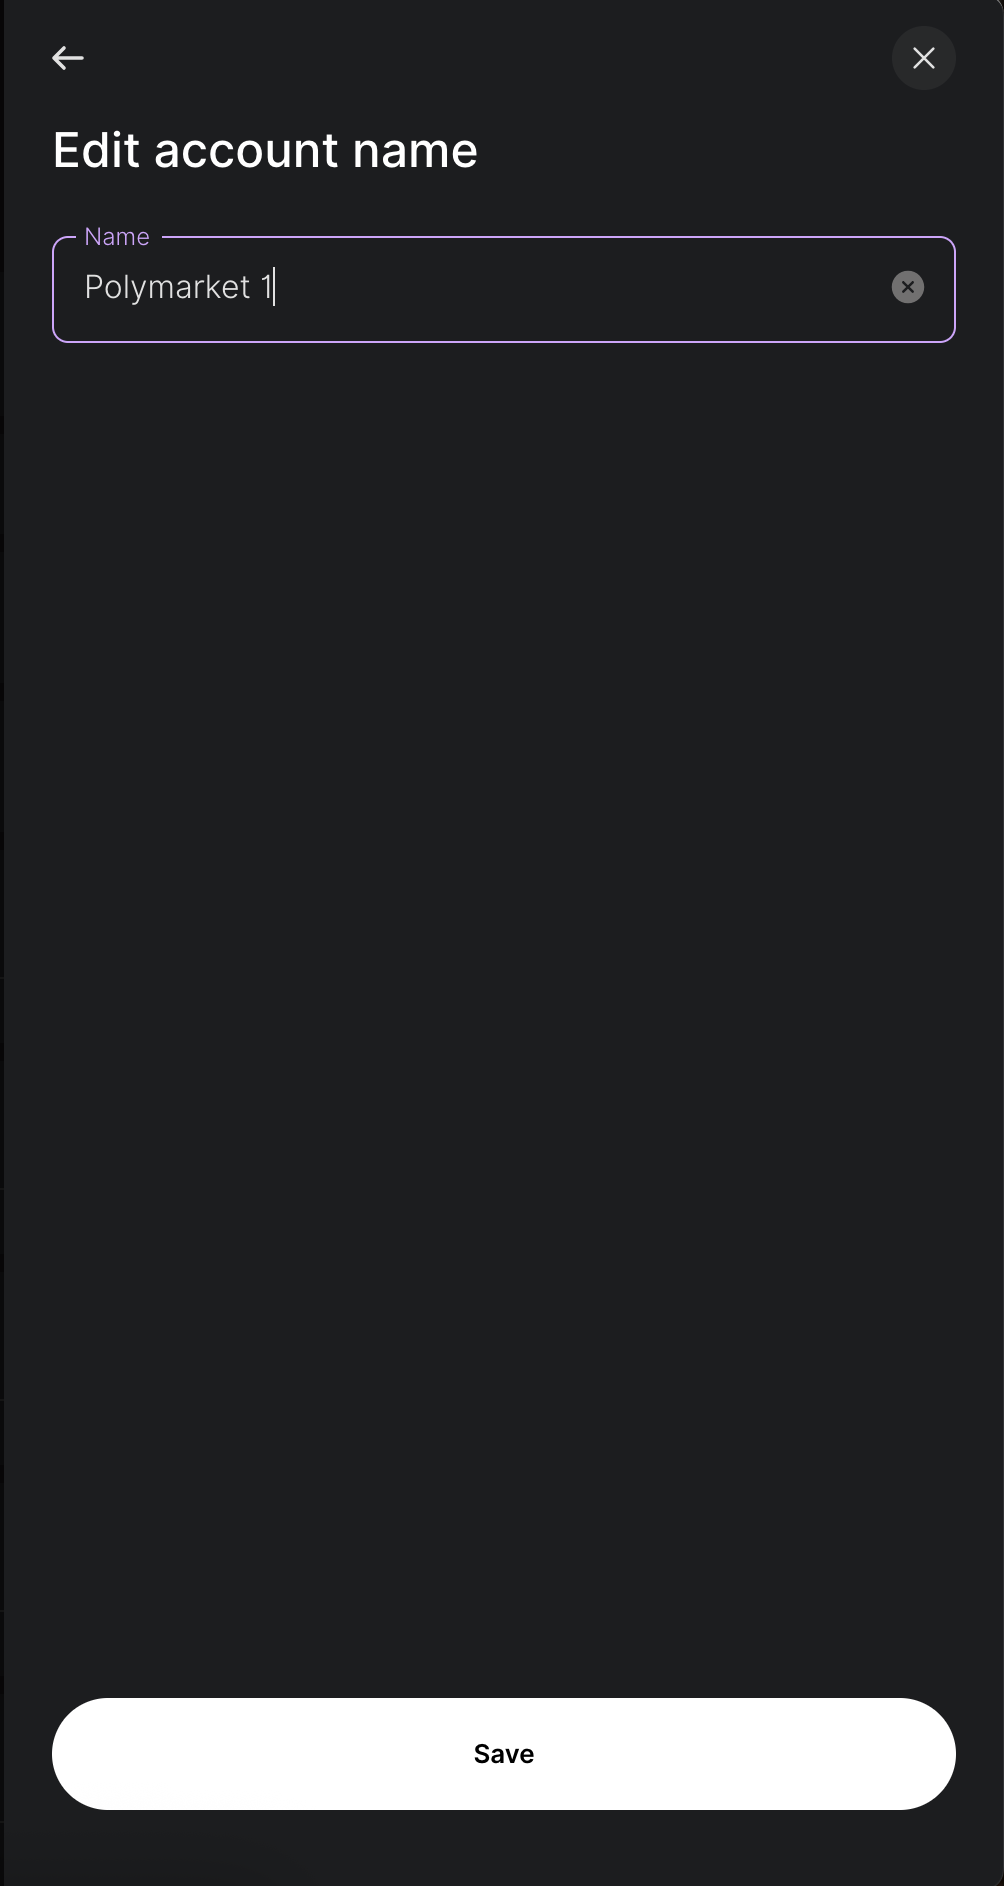
At this point you could just click close, however it is good practice to name your accounts so you know what they're being used for. So click the pencil icon next to the amount in the account.
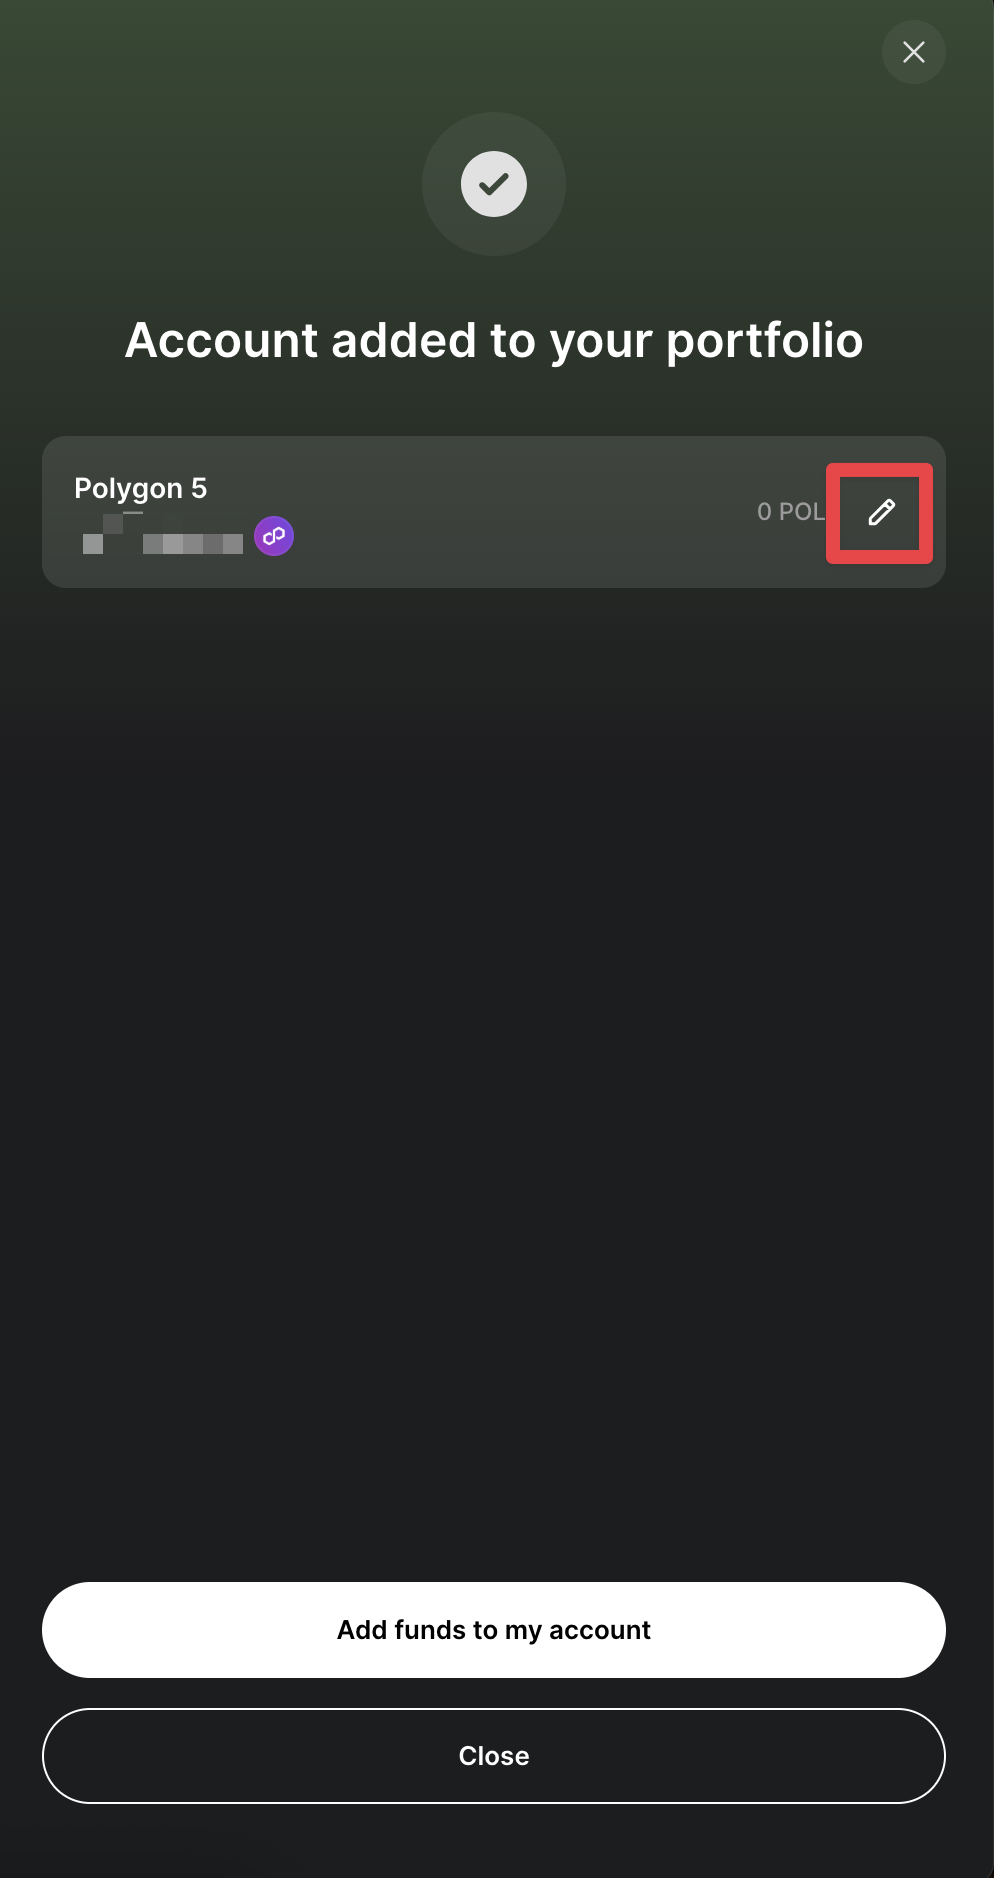
-
Type in the name you want, then click "Save".
- Now click "Close".


NOTE: you do not need to put anything in the Polygon account, because we're going to fund using the Arbitrum account. The Polygon account just needs to exist so we can use it to connect to Polymarket.

Step 2. Import the Arbitrum account on your Ledger into Rabby
NOTE: you’ll need your wallet to be active, which means entering your PIN in if you need to. If you forget to do this you will get an error message, just enter the PIN and click “Continue” again and it should be fine.
NOTE: if you’re using a Ledger and you don’t already have blind signing enabled in the Ethereum app on the device, you will need to enable it to complete this transaction. Just open the Ethereum app, go to “app settings”, find the screen that says “blind signing disabled” and click both buttons on the device to enable it.
- Open your Rabby wallet & click the arrow next to your wallet address

- Click 'Add new address'

- Click 'Connect hardware wallets'

- Click 'Ledger'

- Click 'Next'

- Click 'Allow'

- Select your device from the list
- Click 'Connect'

- Select the new Arbitrum account you've set up on your Ledger device
- Click 'Done'

- Name your new imported Ledger account
- Click 'Open wallet'

You should now be able to see your new imported Ledger account

Step 3. Connecting Your Ledger Device to Polymarket
- Now, navigate to https://polymarket.com/ and click on 'Sign up'

- Ensure the imported Ledger account is selected
- Click 'Connect'

- Click 'Begin signing process'

- Follow the prompts on your Ledger device to confirm the connection

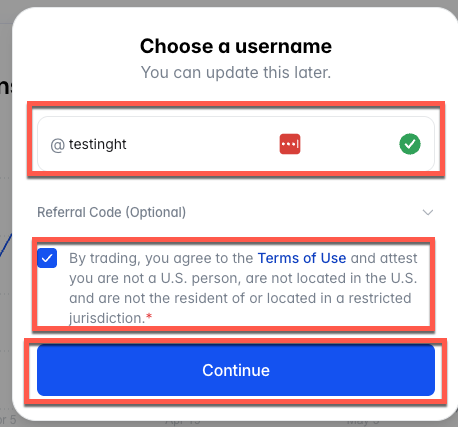
- Enter a username
- Ensure the box is checked
- Click ‘Continue’
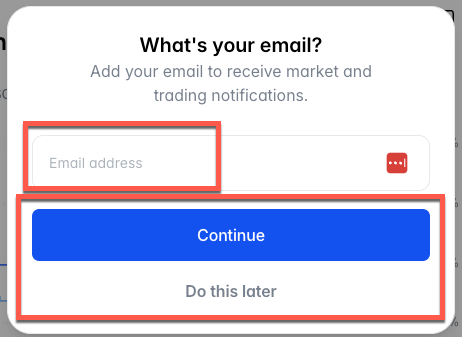
- Enter your email address & click ‘Continue’ if you’d like email updates
- If you’d rather not, click ‘Do this later’
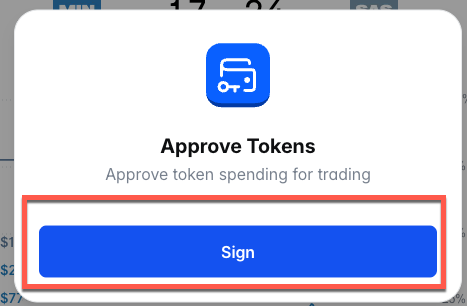
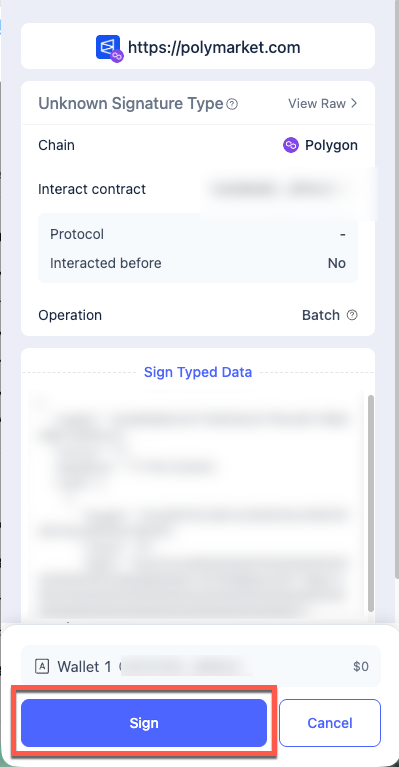
- Click ‘Enable Trading’

- Click ‘Sign’
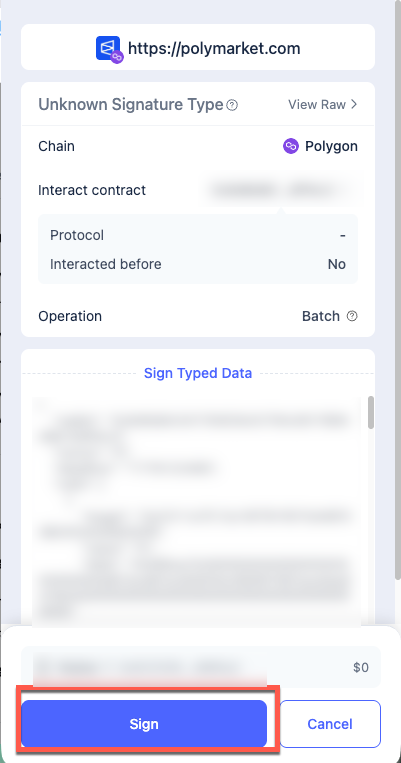
- Click ‘Sign’
- Click ‘Confirm’
- Click ‘Enable Auto-redeem’
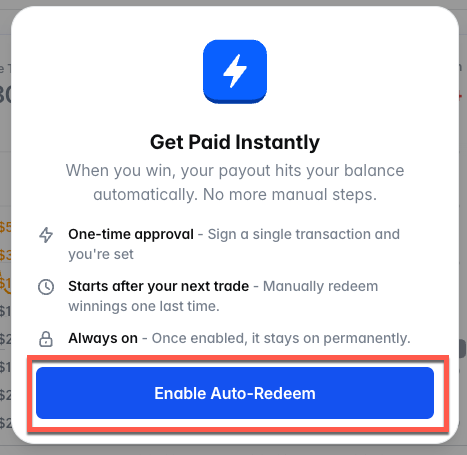
- Click ‘Sign’
- Click ‘Continue’

Step 4. Funding Your Polymarket Account
- Click on 'Deposit Funds'

- Click on the connected Rabby wallet (your imported Ledger account)
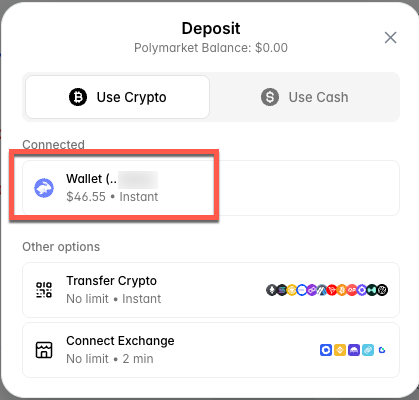
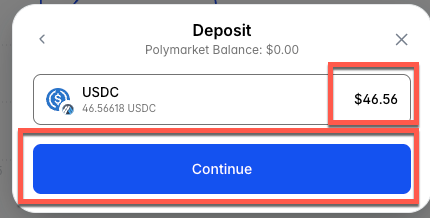
- Your USDC balance will be displayed for the connected Rabby wallet
- Click 'Continue'
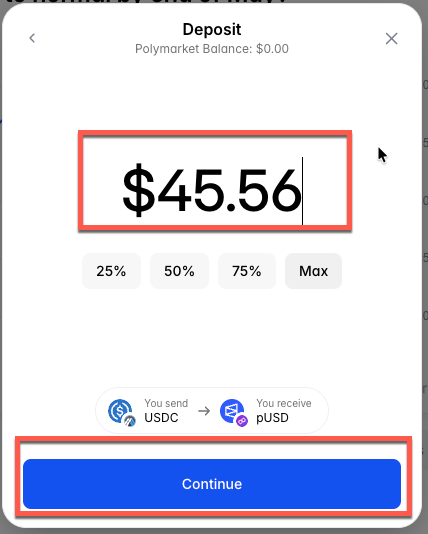
- Enter the amount you wish to deposit
- Click 'Continue'
- Check that all details look correct
- Click 'Confirm order'
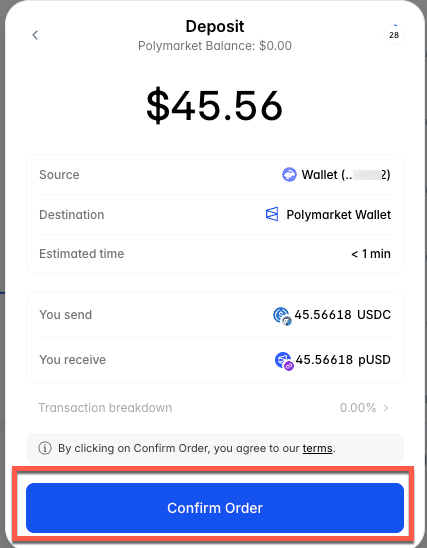
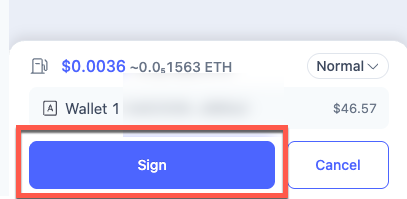
A transaction will appear in your Rabby wallet that needs to be confirmed. You will also need to confirm the deposit on your Ledger device.
- Click 'Sign'
- Click 'Continue'
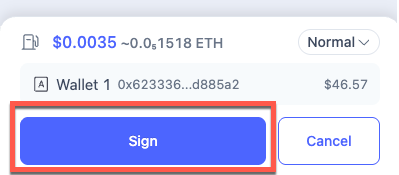
Another transaction will appear in your Rabby wallet & on your ledger device that needs to be confirmed.
- Click 'Sign'
- Click 'Continue'
You will now see a screen that confirms the deposit is processing
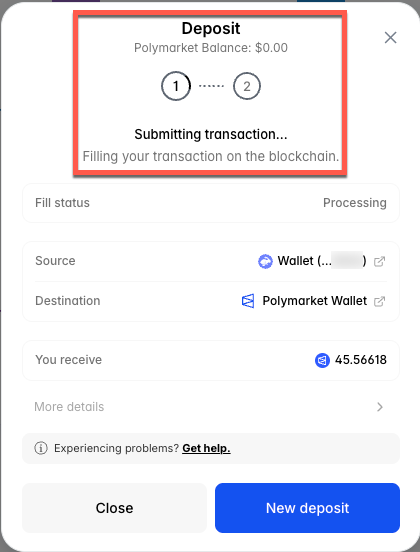
The deposit can take up to 1 minute to process. Once it's completed, you should receive the confirmation shown below
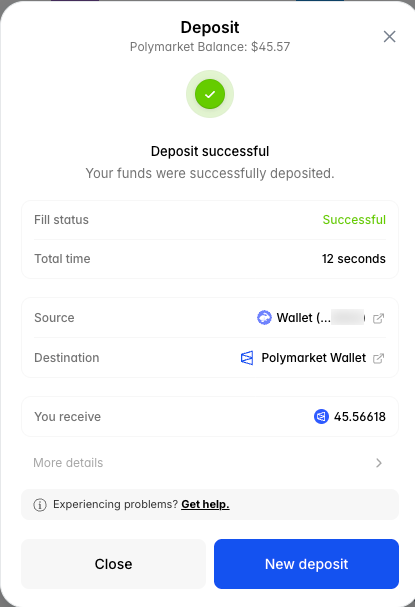
You can now click 'Close, and you should see your balance reflected on Polymarket